The Optavia Dining Out Guide 2023 empowers users to make healthy, program-compliant choices while enjoying meals at restaurants. It offers tips, strategies, and approved menu options to support weight loss and overall wellness, ensuring dining out remains enjoyable and aligns with Optavia’s lean and green meal principles.
Overview of the Optavia Program and Its Lean and Green Meal Guidelines
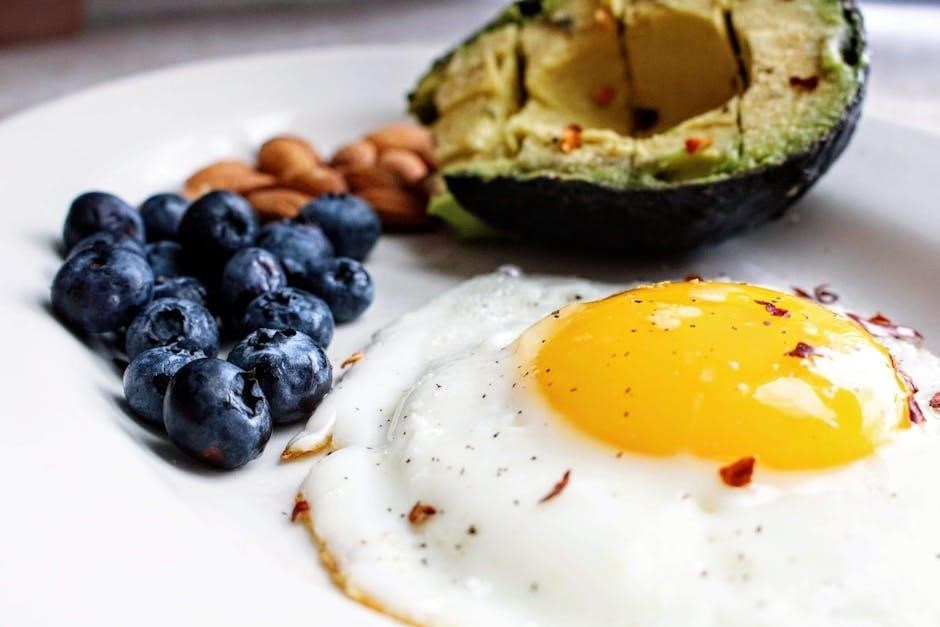
The Optavia program is a low-carbohydrate, reduced-calorie lifestyle plan designed for weight loss, combining prepared meals (Fuelings) with a focus on lean protein and non-starchy vegetables. Central to the program is the “Lean and Green” meal, which consists of 5-7 ounces of lean protein, 3 servings of non-starchy vegetables, and up to 2 tablespoons of healthy fats. This structure helps control calories, carbohydrates, and portion sizes, promoting weight loss and maintenance. The program encourages balanced nutrition, flexibility, and sustainability, making it adaptable to various lifestyles while emphasizing whole, nutrient-dense foods.
Importance of Making Healthy Choices While Dining Out
Dining out can be challenging while following the Optavia program, but making healthy choices is crucial for maintaining progress. Restaurants often offer high-calorie, high-carb, and high-fat options, which can derail weight loss efforts. By adhering to Optavia’s lean and green meal guidelines, individuals can enjoy meals that align with their health goals. Healthy choices while dining out not only support weight management but also promote overall wellness. Sticking to lean proteins, non-starchy vegetables, and portion control ensures that meals remain balanced and nutritious. This approach helps individuals stay consistent with their program, even in social or celebratory settings, fostering long-term success and healthier habits.

Understanding Optavia-Friendly Restaurant Options
Optavia-friendly restaurants offer menu items that align with the program’s lean and green meal guidelines, focusing on lean proteins, non-starchy vegetables, and avoiding high-carb, high-calorie options.
How to Research Menus in Advance for Optavia Compliance
Researching menus ahead of time is crucial for Optavia compliance while dining out. Visit the restaurant’s website to review their menu and identify lean protein and green vegetable options. Look for items that align with Optavia’s lean and green meal guidelines, such as grilled meats, fish, or salads with minimal added ingredients. Avoid high-carb and high-calorie options like pasta, bread, and sugary sauces. Use the Optavia Dining Out Guide or mobile app for pre-approved choices. If unsure, contact the restaurant to confirm ingredients or preparation methods. This proactive approach ensures you can enjoy a meal that supports your weight loss and wellness goals without compromising your progress.
Key Questions to Ask Your Server About Menu Items
To ensure Optavia compliance, ask your server specific questions about menu items. Inquire about ingredients, portion sizes, and preparation methods. Ask if proteins are grilled, baked, or fried, and request no added oils, sauces, or seasonings high in carbs or calories. Check if vegetables are steamed or sautéed without butter or sugars. Confirm if sides like salads or green vegetables can replace high-carb options like rice or potatoes. Also, ask about the availability of lean protein sources and low-calorie dressings. These questions help you make informed choices that align with Optavia’s lean and green meal guidelines, ensuring your dining experience supports your weight loss and wellness goals effectively.
Optavia-Approved Dining Out Strategies
Optavia-approved strategies focus on selecting lean proteins, green vegetables, and avoiding high-carb, high-calorie options. Emphasize portion control, mindful ordering, and aligning choices with Optavia’s lean and green meal guidelines.
Sticking to Lean Protein and Green Vegetables
Optavia’s core philosophy emphasizes lean protein and green vegetables as the foundation of a healthy meal. When dining out, prioritize menu items featuring grilled, baked, or steamed lean proteins like chicken, fish, or turkey. Pair these with non-starchy green vegetables such as broccoli, asparagus, or spinach. Avoid sauces or seasonings high in sugar or carbs. Opt for side salads with vinaigrette instead of creamy dressings; Ensure portions align with Optavia’s guidelines to maintain calorie and carb balance. This approach not only supports weight loss but also promotes overall wellness, keeping you on track with your Optavia program while enjoying restaurant meals.
Avoiding High-Carb and High-Calorie Options
Avoiding High-Carb and High-Calorie Options
Avoiding high-carb and high-calorie options is crucial while dining out on the Optavia program. Steer clear of bread, pasta, rice, and sugary sauces, as these can derail your progress. Opt for meals that focus on lean proteins and green vegetables, avoiding extras like cheese, croutons, and dressings high in calories. Request modifications such as no bun for burgers or no starch sides. Be mindful of portion sizes and skip fried or battered items, which are typically high in calories and carbs. By making these choices, you can enjoy restaurant meals while staying aligned with Optavia’s lean and green guidelines, supporting your weight loss and wellness goals effectively.
Popular Restaurants and Their Optavia-Friendly Options
Explore Optavia-friendly choices at popular eateries like grilled chicken chains, seafood spots, and salad bars, where lean proteins and veggies are easily accessible and adaptable.
Fast Food Chains with Suitable Lean and Green Meals
Several fast-food chains offer Optavia-friendly options. Grilled chicken breast from chains like Chick-fil-A or Subway is a lean protein choice. Opt for salads with grilled chicken, avoiding high-calorie dressings. Many restaurants now provide lettuce wraps or low-carb alternatives, which can be adapted to fit the lean and green guidelines. Additionally, some chains offer vegetable-based sides, such as steamed broccoli or a side salad, which complement the protein. Always request modifications like no buns, sauces, or cheeses to keep meals compliant. These options make it easier to stick to the Optavia program while dining out on the go.
Sit-Down Restaurants Offering Healthy Alternatives
Many sit-down restaurants now cater to health-conscious diners by offering Optavia-friendly dishes. Grilled fish, such as salmon or tilapia, paired with steamed vegetables, is a common lean and green option. Restaurants like Olive Garden provide vegetable-based sides, while others may offer protein-focused entrees without high-carb additions. Requesting modifications, like holding the pasta or rice, can easily tailor meals to fit the program. Some establishments even highlight healthier options on their menus, making it easier to choose compliant dishes. By focusing on protein and vegetable-heavy plates, diners can enjoy a satisfying meal while staying on track with their Optavia plan.

Handling Challenges While Dining Out
Dining out presents challenges like tempting carbs and large portions. Stay focused on lean proteins and greens, avoid high-calorie extras, and practice portion control to stay on track.
Dealing with Cravings and Portion Control
Managing cravings and portion control is crucial while dining out on the Optavia program. Start by staying hydrated, as thirst can often mimic hunger. Opt for water or herbal teas to help curb unnecessary snacking. When cravings strike, focus on lean proteins and green vegetables, which are satiating and align with Optavia’s guidelines. Practice mindful eating by savoring each bite slowly, allowing your brain to register fullness. Avoid distractions like smartphones to stay focused on your meal. If portion sizes are large, consider requesting a smaller serving or taking leftovers home. Remember, staying consistent with your lean and green meal plan will help maintain progress and reduce temptation.
What to Do If a Restaurant Doesn’t Offer Optavia-Friendly Options
If a restaurant lacks Optavia-friendly options, remain calm and proactive. Politely ask your server if they can modify a dish to meet your needs, such as grilling protein without added oils or serving vegetables without sauces. If modifications aren’t possible, consider bringing a small Optavia fueling to supplement your meal. Additionally, plan ahead by researching alternative restaurants with more flexible menus. Staying prepared and communicating your dietary preferences ensures you can maintain compliance with the Optavia program, even in challenging situations. Remember, consistency is key to achieving and sustaining your health goals.
The Optavia Dining Out Guide 2023 equips you with tools to maintain healthy habits while enjoying meals away from home. Plan ahead, stay consistent, and celebrate small victories to ensure long-term success on your Optavia journey.
How to Maintain Progress After Dining Out
Maintaining progress after dining out requires mindful choices and consistent habits. Stick to Optavia’s lean and green guidelines, track your meals, and balance any indulgences with healthy, portion-controlled options. Prioritize protein-rich and fiber-filled foods to keep you satisfied and on track. Drinking plenty of water and staying active also support overall wellness. By planning ahead and making informed decisions, you can enjoy dining out while staying committed to your weight loss and health goals. Regularly reviewing your progress and adjusting your strategy helps ensure long-term success on the Optavia program.
Planning Ahead for Future Dining Out Experiences

Planning ahead is crucial for successful dining out on the Optavia program. Research restaurant menus in advance to identify lean and green options, ensuring compliance with program guidelines. Contacting the restaurant beforehand to confirm ingredients or request modifications can help avoid last-minute challenges. Additionally, packing Optavia-approved snacks or meals for unexpected situations provides a safety net. Staying informed about portion sizes and hidden calories empowers you to make healthier choices. By anticipating potential obstacles and preparing strategies, you can confidently navigate future dining experiences while maintaining your weight loss and wellness goals. This proactive approach ensures dining out remains enjoyable and aligns with your Optavia journey.