The HTH 6-Way Test Kit is a comprehensive tool designed for pool water testing, ensuring optimal chemical balance and safety․ It simplifies monitoring of pH, chlorine, bromine, alkalinity, calcium hardness, and cyanuric acid levels, providing accurate results for maintaining a healthy swimming environment․ This kit is essential for pool owners seeking reliable and user-friendly testing solutions․
1․1 Overview of the Kit and Its Importance
The HTH 6-Way Test Kit is a comprehensive solution for monitoring pool water chemistry․ It includes test strips and a color chart to measure pH, chlorine, bromine, alkalinity, calcium hardness, and cyanuric acid․ This kit is essential for ensuring water safety, preventing chemical imbalances, and maintaining optimal swimming conditions․ Its ease of use and accuracy make it a vital tool for pool owners․
1․2 Brief History and Development of the HTH 6-Way Test Kit
The HTH 6-Way Test Kit was developed to meet the growing need for accurate and comprehensive pool water testing․ Originating from advancements in water chemistry, it combines simplicity with precision, offering a user-friendly solution for monitoring key parameters․ This kit has evolved to incorporate technological improvements, ensuring reliable results and maintaining its reputation as a trusted tool for pool maintenance․

Key Features of the HTH 6-Way Test Kit
The HTH 6-Way Test Kit offers comprehensive testing for pH, chlorine, bromine, alkalinity, calcium hardness, and cyanuric acid․ Its user-friendly design ensures portability and accurate results, making it essential for maintaining pool water quality with ease and precision․
2․1 Tests Covered: pH, Chlorine, Bromine, Alkalinity, Calcium Hardness, and Cyanuric Acid
The HTH 6-Way Test Kit tests six critical pool water parameters: pH, chlorine, bromine, alkalinity, calcium hardness, and cyanuric acid․ These tests ensure balanced water chemistry, preventing eye irritation, corrosion, and sanitizer inefficiency․ Regular monitoring of these levels is essential for maintaining a safe and healthy swimming environment, making this kit a versatile solution for pool maintenance needs․
2․2 User-Friendly Design and Portability
The HTH 6-Way Test Kit is designed for ease of use, featuring a compact and lightweight structure that enhances portability․ Its ergonomic design allows for convenient handling, making it ideal for pool owners who need to test water regularly․ The kit’s portable nature ensures that you can perform tests anywhere, whether at home or while maintaining a larger pool facility, without hassle․
2․3 Accuracy and Reliability of Results
The HTH 6-Way Test Kit delivers highly accurate and reliable results, ensuring precise measurements for pH, chlorine, bromine, alkalinity, calcium hardness, and cyanuric acid․ Its advanced chemistry and color-coded system provide clear, consistent readings․ The kit’s reliability is enhanced by its high-quality reagents and durable test strips, making it a trusted tool for maintaining optimal pool water chemistry and safety․

Safety Precautions and Handling
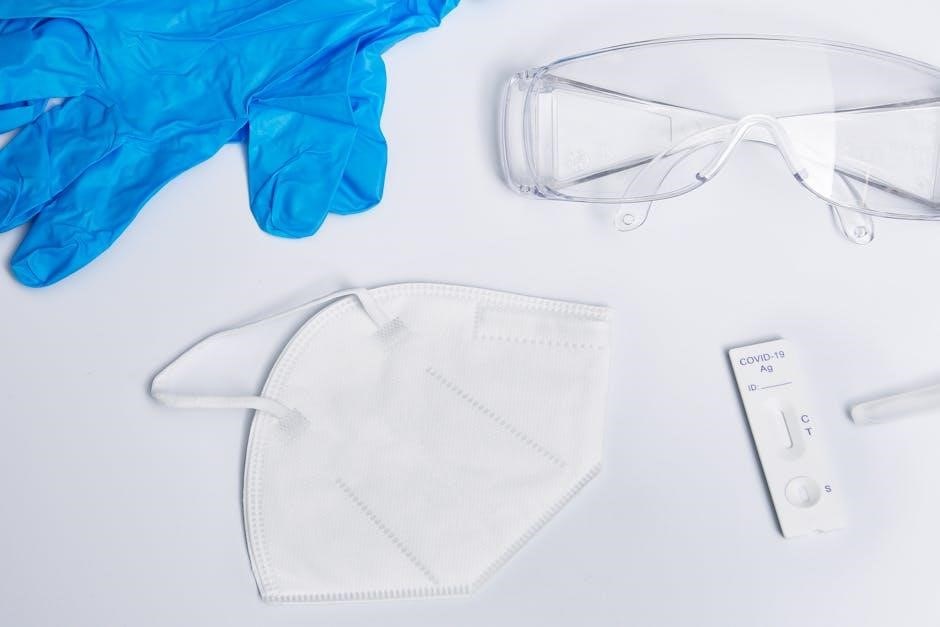
Handling the HTH 6-Way Test Kit requires wearing protective gear and following precautionary statements like P201 and P202․ Ensure proper chemical disposal and avoid exposure to test reagents for safe use․
3;1 Precautionary Statements and Safety Measures
Use the HTH 6-Way Test Kit with caution․ Wear protective gloves and eyewear to avoid skin or eye irritation․ Keep away from children and pets; Follow P201 and P202 statements: obtain special instructions before use and handle carefully․ Ensure proper ventilation and avoid ingesting chemicals․ Prevent accidental exposure by storing reagents securely and dispose of them according to local regulations․
3․2 Proper Storage and Disposal of Chemicals
Store the HTH 6-Way Test Kit in a cool, dry place away from direct sunlight and children․ Keep the kit sealed when not in use to prevent contamination; Dispose of expired or unused chemicals according to local regulations․ Do not discharge test kit reagents into drains without proper treatment․ Ensure proper ventilation during handling and storage․
3․3 Emergency Procedures in Case of Accidental Exposure
In case of eye contact, flush with water for 15 minutes․ For skin contact, wash with soap and water․ If ingested, seek medical attention immediately․ In case of inhalation, move to fresh air and monitor breathing․ Always wear protective gloves and eyewear when handling chemicals․ Keep the kit out of reach of children to prevent accidental exposure․

Step-by-Step Instructions for Using the HTH 6-Way Test Kit
Collect a water sample from elbow depth․ Dip the test strip for 2 seconds, then shake excess water․ Compare colors to the chart and adjust chemicals as needed․ Repeat weekly for optimal results․
4․1 Collecting a Water Sample
Collect a water sample from approximately 18 inches below the surface or at elbow depth․ Rinse the test vial with pool water, then fill to the 10ml mark․ This ensures accurate test results․ Dip the test strip into the sample, holding it upright for 2 seconds, and shake off excess water before comparing colors to the chart․
4․2 Dispensing Test Drops and Mixing
Add 2-3 drops from the test solution to the water sample․ Swirl gently to mix well․ Allow 10-15 seconds for the chemicals to react; Dip the test strip into the mixture, ensuring all pads are submerged․ This ensures accurate results for pH, chlorine, and other parameters․
4․3 Reading and Interpreting Test Results
Dip the test strip into the water sample, then wait 10-15 seconds․ Compare the color pads to the chart provided․ Match each parameter (pH, chlorine, etc․) to the corresponding color․ If colors differ, adjust chemicals as needed․ Immediate comparison ensures accuracy, as colors may fade over time․ This step is crucial for maintaining optimal pool chemistry levels․
4․4 Adjusting Pool Chemicals Based on Results
After interpreting test results, adjust chemicals accordingly․ For low pH, add a pH increaser․ For high pH, add a pH decreaser․ Adjust chlorine or bromine if levels are off․ If alkalinity or calcium hardness is low, add the respective balancers․ Always follow recommended levels and consult the user manual for specific adjustment guidelines to ensure optimal pool chemistry and safety․ Repeat testing after adjustments․
Recommended Testing Frequency
Regular testing is crucial for maintaining optimal pool conditions․ Test your pool water at least twice weekly․ Additional tests are recommended after heavy use or weather changes․
5․1 Weekly Testing for Optimal Pool Maintenance
Weekly testing ensures consistent water quality and prevents chemical imbalances․ Use the HTH 6-Way Test Kit to check pH, chlorine, bromine, alkalinity, calcium hardness, and cyanuric acid levels․ Regular checks help maintain a safe and healthy swimming environment, preventing issues like algae growth or equipment damage․ Consistency is key to optimal pool maintenance․
5․2 Additional Tests After Heavy Use or Weather Changes
After heavy pool use or weather changes, conduct additional tests to maintain water balance․ Rain, wind, or intense sunlight can alter chemical levels, while heavy use increases contaminants․ Use the HTH 6-Way Test Kit to reassess pH, chlorine, and other parameters, ensuring water remains safe and clear․ Adjust chemicals promptly to restore optimal conditions and prevent issues․

Understanding the Color Chart and Results
Compare test strip colors with the provided chart to determine chemical levels․ Each parameter has a specific color range, ensuring accurate interpretation for balanced and safe pool water conditions․
6․1 How to Compare Test Strips with the Color Chart
Dip the test strip into the water sample, hold it upright, and shake off excess․ Immediately compare the strip colors with the chart, matching each parameter carefully․ Ensure accurate alignment to determine chemical levels precisely, as each strip corresponds to a specific color range on the chart for reliable results․
6․2 Interpreting Color Variations and What They Mean
Color variations on the test strip indicate chemical levels․ Match each strip color to the chart, noting deviations from the ideal range․ Darker shades often signify higher levels, while lighter tones mean lower concentrations․ Significant discrepancies may signal imbalanced water chemistry, requiring adjustments to maintain safe and healthy pool conditions for swimmers․
Troubleshooting Common Issues
Invalid test results may occur due to expired reagents or improper sample collection․ Color mismatches could indicate contamination or incorrect strip handling․ Always follow instructions precisely․
7․1 Incorrect Test Results and Possible Causes
Incorrect test results may occur due to expired reagents, improper sample collection, or contaminated test strips․ Issues like uneven color development or unexpected readings can stem from mishandling, such as touching the test pads or shaking the strip excessively․ Environmental factors, like direct sunlight or temperature extremes, can also affect accuracy․ Always ensure proper technique and storage․
7․2 Resolving Discrepancies in Test Strip Colors
Discrepancies in test strip colors may arise from improper strip handling, such as shaking excessively or exposing strips to chemicals․ Ensure strips are compared immediately to the color chart and avoid touching the test pads․ If results are unclear, retest using a fresh sample and follow instructions precisely․ Timing and technique are critical for accurate color matching․
Maintenance and Care of the Test Kit
Regularly clean and store test strips in a dry, cool place to prevent contamination․ Replace expired reagents and damaged components to ensure accurate results․
8․1 Cleaning and Storing Test Strips
After use, gently wipe test strips with a soft, dry cloth to remove moisture․ Store them in a cool, dry place away from direct sunlight to maintain accuracy․ Keep the test strip container tightly sealed to prevent contamination and humidity exposure․ Avoid touching the test pads, as oils from skin can affect results․ Regular cleaning ensures longevity and reliable performance․
8․2 Replacing Expired or Damaged Components
Replace expired or damaged components promptly to ensure accurate test results․ Test strips and chemical reagents may degrade over time․ Check expiration dates and inspect for visible damage․ Order replacement parts from authorized HTH retailers or the official website․ Ensure compatibility with your kit model․ Refer to the HTH 6-Way Test Kit instructions PDF for guidance on replacing components correctly․
Comparison with Other Pool Test Kits
The HTH 6-Way Test Kit stands out for its multi-parameter testing, ease of use, and cost-effectiveness․ It offers comprehensive results compared to basic test kits, ensuring better pool maintenance and safety․
9․1 Advantages Over Traditional Test Kits
The HTH 6-Way Test Kit offers superior convenience by testing six parameters in one go, unlike traditional kits that require multiple tests․ Its user-friendly design, portability, and quick results make it ideal for regular pool maintenance․ Additionally, it provides accurate readings, reducing the need for repeat testing and saving time for pool owners․
9․2 Unique Features of the HTH 6-Way Test Kit
The HTH 6-Way Test Kit uniquely combines six essential water tests in one strip, ensuring comprehensive pool care․ Its color chart provides quick, visual results interpretation․ Designed for both indoor and outdoor pools, it offers unparalleled convenience․ The kit includes safety precautions and clear instructions, along with tips for accurate testing and troubleshooting, making it a complete solution for pool maintenance․
Frequently Asked Questions (FAQs)
How do I use the HTH 6-Way Test Kit?
– Collect a water sample, dispense drops, and compare results with the color chart․
Is the kit accurate?
– Yes, it provides reliable results for pH, chlorine, bromine, alkalinity, calcium hardness, and cyanuric acid․
Where can I find the instructions?
– Download the official HTH 6-Way Test Kit Guide from the manufacturer’s website for detailed instructions․
How often should I test?
– Test weekly for optimal pool maintenance, and additional tests after heavy use or weather changes․
What if results are unclear?
– Refer to the color chart or consult the troubleshooting section in the guide for assistance․
Can I reuse test strips?
– No, test strips are single-use to ensure accuracy and reliability․
How do I store the kit?
– Keep it in a cool, dry place, away from direct sunlight and chemicals․
Are the chemicals safe?
– Follow safety precautions and handle with care to avoid exposure․
Can I use it for saltwater pools?
– Yes, the kit works for both chlorine and bromine-based pools, including saltwater systems․
How long does testing take?
– The process is quick, with results available in minutes after sample collection․
Are replacement strips available?
– Yes, purchase additional strips or a new kit as needed to maintain your pool․
Is the kit worth the investment?
– Customers find it excellent value for money, simple to use, and durable enough to last a whole season․
What if I get inconsistent results?
– Double-check your technique or refer to the troubleshooting guide for common issues․
Can I use it for hot tubs?
– Yes, the kit is suitable for testing hot tub water as well as pools․
How accurate are the test strips?
– The strips are designed to provide accurate results when used correctly, ensuring proper pool chemical balance․
What if I accidentally ingest a chemical?
– Refer to the safety data sheet or seek immediate medical attention if needed․
Can I use it for other water sources?
– The kit is specifically designed for pool and hot tub water testing, not for drinking water․
How do I dispose of expired chemicals?
– Follow local regulations for proper disposal of expired or unused test kit chemicals․
Is the kit eco-friendly?
– The kit is designed to minimize waste, but proper disposal is still necessary․
Can I purchase it online?
– Yes, the HTH 6-Way Test Kit is available from various online retailers and pool supply stores․
Does it come with a warranty?
– Check the manufacturer’s website for warranty details and customer support information․
How do I know if the kit is expired?
– Check the expiration date on the packaging or refer to the instructions for guidance․
Can I use it for commercial pools?
– Yes, the kit is suitable for both residential and commercial pool testing needs․
Is the kit easy to carry?
– Yes, its compact design makes it portable and easy to store․
What if I lose the color chart?
– Download a replacement from the official HTH website or refer to the digital guide․
Can I test multiple parameters at once?
– Yes, the 6-way test strip allows you to test all six parameters simultaneously․
How do I clean the test vial?
– Rinse the vial thoroughly with clean water after each use to prevent contamination․
Can I use it for aquariums?
– No, it is specifically designed for pool and hot tub water testing․
What if the test results are outside the recommended range?
– Adjust your pool chemicals according to the instructions to bring levels back within the safe range․
Is the kit suitable for beginners?
– Yes, its user-friendly design makes it easy for anyone to use, regardless of experience․
Can I test water temperature?
– No, the kit does not measure temperature; use a separate thermometer for that․
How do I know if the test strips are damaged?
– Check for discoloration, fading, or physical damage before use․
Can I use it for well water?
– No, it is specifically designed for pool and hot tub water testing, not for well water․
What if I have a question not covered here?
– Contact HTH customer support for additional assistance or visit their official website․
Is the kit available internationally?
– Yes, check with local retailers or online sellers for availability in your region․
Can I use it for bromine and chlorine testing at the same time?
– Yes, the kit tests for both free chlorine and bromine levels simultaneously․
How do I prevent test strip errors?
– Follow the instructions carefully and ensure the strip is not exposed to air for too long․
Can I use it for saltwater pools?
– Yes, the kit is compatible with saltwater pools and provides accurate results․
Is the kit suitable for large pools?
– Yes, it works for pools of all sizes, including large commercial pools․
How do I store the test strips?
– Keep them in the original container, away from direct sunlight and moisture․
Can I use it for testing cyanuric acid levels?
– Yes, the kit includes a test for cyanuric acid to ensure proper stabilizer levels․
What if I get conflicting results?
– Re-test the water sample to confirm results and ensure accurate readings․
Can I use it for routine maintenance?
– Yes, regular testing with the kit helps maintain optimal pool conditions throughout the season․
Is the kit compatible with all pool types?
– Yes, it works for chlorine, bromine, and saltwater pools, as well as hot tubs․
How do I know when to replace the test strips?
– Replace them if they are expired, damaged, or show signs of wear․
Can I use it for emergency water testing?
– Yes, it provides quick results, making it ideal for emergency testing situations․
Is the kit eco-friendly?
– The kit is designed to minimize waste, but proper disposal of chemicals is still necessary․
Can I use it for testing alkalinity levels?
– Yes, the kit includes a test for total alkalinity to ensure proper pH stability․
What if I have trouble reading the color chart?
– Compare the test strip carefully and refer to the digital guide for assistance․
Can I use it for testing calcium hardness?
– Yes, the kit includes a test for calcium hardness to prevent pool damage․
Is the kit suitable for pool professionals?
– Yes, it is a reliable tool for professionals to maintain accurate pool chemistry․
How do I prevent contamination of the test strip?
– Avoid touching the test pad and keep the strip dry before use․
Can I use it for testing free chlorine levels?
– Yes, the kit provides accurate free chlorine readings for proper disinfection levels․
Is the kit easy to understand for non-experts?
– Yes, the instructions and color chart make it easy for anyone to interpret results․
Can I use it for testing bromine levels?
– Yes, the kit includes a test for bromine to ensure safe and effective sanitization․
What if I need help interpreting results?
– Refer to the color chart or consult the troubleshooting section in the guide․
Can I use it for testing pH levels?
– Yes, the kit includes a pH test to ensure water is safe and comfortable for swimmers․
Is the kit a good value for the price?
– Customers find it to be excellent value for money, simple to use, and durable․
Can I use it for testing cyanuric acid levels?
– Yes, the kit includes a test for cyanuric acid to ensure proper stabilizer levels․
How do I ensure accurate test results?
– Follow the instructions carefully and use fresh test strips for each test․
Can I use it for testing total alkalinity levels?
– Yes, the kit includes a test for total alkalinity to ensure proper pH stability․
Is the kit suitable for seasonal pool use?
– Yes, it is durable enough to last a whole season with proper care․
Can I use it for testing calcium hardness levels?
– Yes, the kit includes a test for calcium hardness to prevent pool damage․
What if I have a question about the results?
– Consult
10․1 Common Queries About the HTH 6-Way Test Kit
Users often ask how to use the HTH 6-Way Test Kit, where to find instructions, and how to interpret results․ Common questions include testing frequency, accuracy, and troubleshooting tips․ Many inquire about the kit’s compatibility with different pool types and its ease of use․ Additionally, users seek guidance on proper chemical adjustment and the importance of following the guide for maintaining pool health and safety․
10․2 Solutions to Frequently Encountered Problems
For inaccurate results, ensure proper test strip handling and avoid cross-contamination․ If colors don’t match the chart, check strip expiration and compare correctly․ Store strips in a cool, dry place․ Replace expired components promptly․ Follow instructions carefully to avoid errors․ For persistent issues, consult the digital guide or contact HTH support for assistance and troubleshooting tips to resolve common challenges effectively and maintain accurate testing outcomes․
Tips for Achieving Accurate Results
Collect samples at elbow level, avoid cross-contamination, and wear gloves․ Compare test strip colors immediately with the chart for precise readings․ Follow instructions carefully to ensure reliable outcomes and maintain accurate pool chemical levels consistently․
11․1 Best Practices for Testing Pool Water
For accurate results, test water at elbow depth, avoiding surface contamination․ Use clean, dry test strips and compare colors immediately with the chart․ Store strips in a cool, dry place to maintain accuracy․ Always follow the kit’s instructions precisely and test weekly to ensure optimal pool chemistry and safety for swimmers․
11․2 Avoiding Common Mistakes During Testing
Avoid touching test strip pads with fingers, as oils can contaminate results․ Do not dip strips multiple times or wait too long before comparing colors․ Ensure the sample is taken at the correct depth and avoid shaking excess water improperly․ Always use the correct number of drops and reference the color chart immediately for accurate readings․
Downloading the HTH 6-Way Test Kit Instructions PDF
Visit the official HTH website to download the 6-Way Test Kit Instructions PDF․ This digital guide provides detailed steps and tips for accurate pool water testing․
12․1 Where to Find the Official Instructions Online
The HTH 6-Way Test Kit Instructions PDF is available on the official HTH website․ Visit their support or resources section and search for the specific product․ Ensure you download from trusted sources to avoid unauthorized versions․
12․2 Benefits of Referencing the Digital Guide
Referencing the HTH 6-Way Test Kit Instructions PDF provides convenient access to detailed testing procedures, ensuring accurate results․ The digital guide offers step-by-step instructions, color charts, and troubleshooting tips, making it an invaluable resource for optimal pool maintenance․ It also includes updated information and best practices for using the test kit effectively․
Additional Resources for Pool Maintenance
Explore supplementary guides, video tutorials, and HTH Pool Care tools for advanced maintenance․ Utilize checklists, chemical calculators, and HTH’s expert tips to enhance your pool care routine․
13․1 Supplementary Guides and Tutorials
Access detailed guides and video tutorials to enhance your pool maintenance skills․ These resources cover advanced testing techniques, troubleshooting, and chemical adjustment tips․ Find them in the HTH 6-Way Test Kit Instructions PDF or on the official HTH website for comprehensive support and best practices in pool care․
13․2 HTH Pool Care Additional Tools and Products
HTH offers a range of pool care products, including test strips, maintenance guides, and cleaning supplies․ These tools complement the 6-Way Test Kit, ensuring comprehensive pool maintenance․ Explore their catalog for pH balancers, shock treatments, and algae preventers to keep your pool clean and safe․ Visit the official HTH website for a full list of products tailored to your pool care needs․
Understanding Pool Chemistry Basics
Pool chemistry involves balancing key elements like pH, chlorine, and alkalinity to ensure water safety and clarity․ Proper levels prevent damage and maintain a healthy swimming environment․
14․1 Importance of Balancing Pool Chemicals
Balancing pool chemicals is crucial for maintaining water safety, clarity, and equipment longevity․ Proper levels prevent eye irritation, skin discomfort, and corrosion of pool equipment, ensuring a healthy and enjoyable swimming environment․ Regular testing with the HTH 6-Way Test Kit helps achieve optimal chemical harmony, safeguarding both swimmers and pool infrastructure․
14․2 Role of Each Tested Parameter in Pool Health
Each parameter tested by the HTH 6-Way Kit plays a vital role in pool health․ pH levels ensure swimmer comfort and chemical effectiveness․ Chlorine and bromine sanitize water, preventing harmful bacteria․ Alkalinity stabilizes pH, while calcium hardness prevents corrosion․ Cyanuric acid protects chlorine from sunlight degradation, ensuring balanced and safe pool conditions for optimal enjoyment and maintenance․
Customer Reviews and Feedback
Customers praise the HTH 6-Way Test Kit for its simplicity, accuracy, and durability․ Many find it excellent value for money, making pool maintenance easier and more efficient․
15․1 What Users Are Saying About the HTH 6-Way Test Kit
Users highly recommend the HTH 6-Way Test Kit, praising its ease of use and reliability․ Many appreciate its comprehensive testing capabilities, which ensure accurate pool water chemistry․ The kit’s durability and value for money are frequently highlighted, making it a top choice for pool maintenance․ Positive feedback underscores its effectiveness in maintaining safe and balanced pool conditions․
15․2 Overall Satisfaction and Recommendations
Overall satisfaction with the HTH 6-Way Test Kit is high, with users commending its accuracy and user-friendly design․ Many recommend it for its reliability and effectiveness in pool maintenance․ The kit’s ability to test multiple parameters ensures comprehensive pool care, making it a recommended tool for achieving and maintaining ideal water chemistry levels consistently throughout the season․