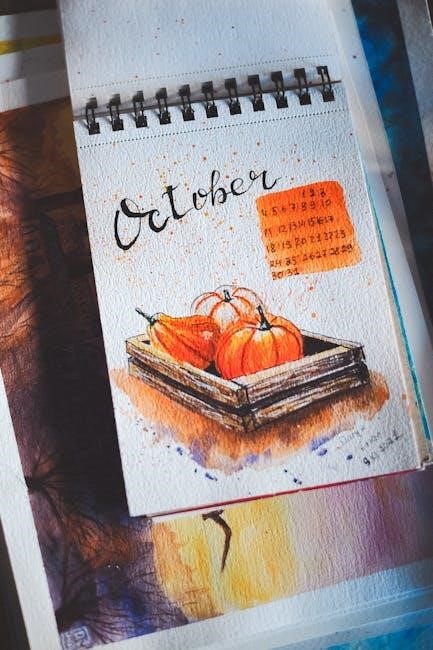
Welcome to this step-by-step guide on painting a watercolor pumpkin! Perfect for all skill levels, this tutorial will walk you through the creative process of bringing your pumpkin to life with vibrant colors and delicate strokes. Whether you’re a beginner or an experienced artist, this project offers a fun and rewarding way to explore watercolor techniques while capturing the essence of autumn. Let’s dive into the basics and get ready to create something truly special!
1.1 Overview of the Tutorial
This tutorial offers a comprehensive guide to painting a watercolor pumpkin, ideal for artists of all skill levels. It covers essential techniques, materials, and step-by-step methods to create a vibrant, autumn-inspired piece. The process begins with sketching basic shapes and progresses through layered painting, blending, and detailing; Whether you’re a beginner exploring watercolor basics or an experienced artist refining your skills, this tutorial provides a clear and engaging path to crafting a beautiful pumpkin artwork. The focus is on capturing texture, color, and depth while enjoying the creative journey.
1.2 Importance of Watercolor Techniques
Mastering watercolor techniques is essential for achieving the desired effects in your pumpkin painting. Understanding methods like wet-on-wet and wet-on-dry allows for smooth blending and texture creation. These techniques enable you to control pigment flow and saturation, crucial for capturing the pumpkin’s organic shape and depth. Proper layering and timing prevent over-saturation and ensure vibrant, lifelike colors. Watercolor’s unpredictability can be harnessed to create unique, dynamic results, making each piece distinctive. By refining these skills, you’ll unlock the full potential of watercolor, bringing your pumpkin artwork to life with stunning realism and artistic flair.
1.3 Materials Needed
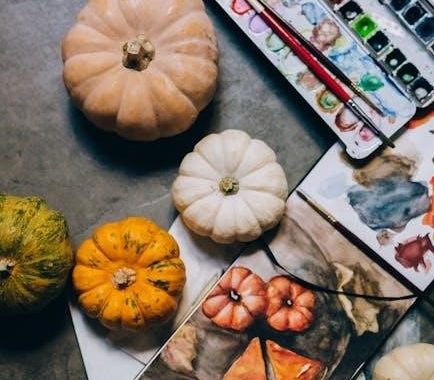
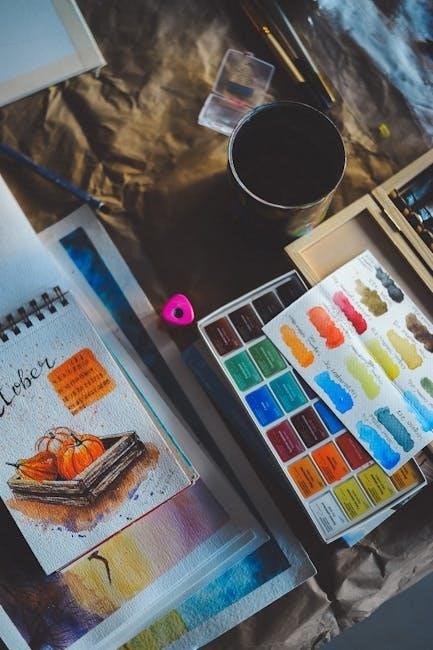
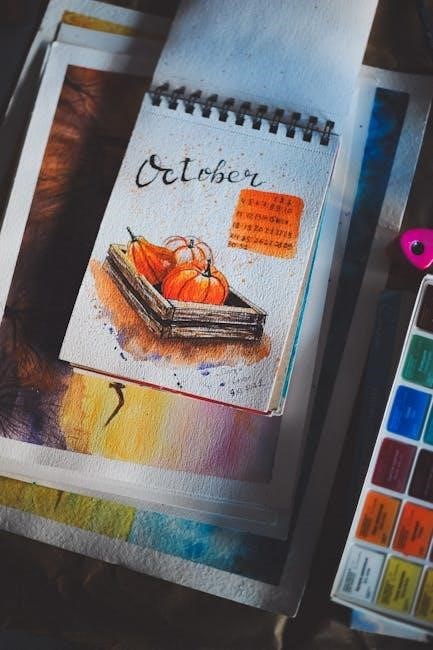
To create a stunning watercolor pumpkin, gather essential materials. Start with high-quality watercolor paper (preferably 100% cotton, 140 lb or heavier) for durability and texture. Choose watercolor paints with light-fast pigments for vibrant, long-lasting colors. Select a variety of brushes, including round, flat, and detail brushes, to achieve different effects. Additional tools like pencils, erasers, a palette, and a water container are crucial for sketching and mixing. Optional items include masking fluid for highlights and a spray bottle for blending. These materials will help you achieve the best results and bring your pumpkin design to life.
Essential Materials for Watercolor Pumpkin Painting
Discover the essential materials needed to create a beautiful watercolor pumpkin. This section covers the must-haves, from paper to paints, ensuring a successful artistic experience.
2.1 Watercolor Paper Selection
Selecting the right watercolor paper is crucial for your pumpkin painting. Opt for high-quality, 100% cotton paper, such as Arches 140 lb or Fabriano Artistico, to ensure durability and minimal warping. Cold press paper is ideal for its textured surface, allowing for beautiful blending and detail. Avoid thin or low-quality papers, as they may buckle under multiple layers of water and pigment. Choosing the right paper will enhance your painting experience and help achieve the desired results for your watercolor pumpkin artwork.
2.2 Watercolor Paints and Pigments
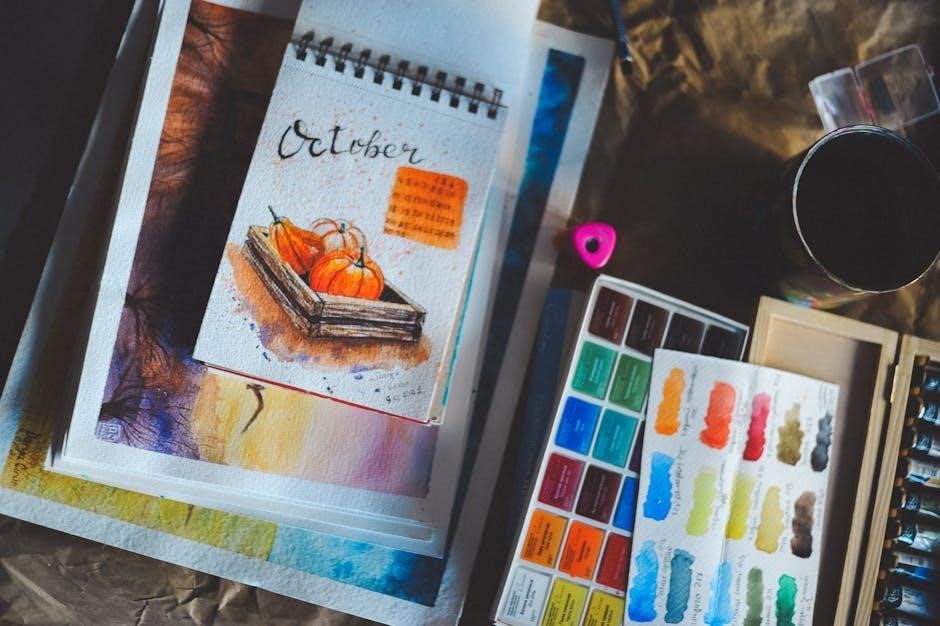
Choose high-quality watercolor paints for your pumpkin tutorial to ensure vibrant, lasting colors. Opt for lightfast, single-pigment paints from reputable brands like Daniel Smith or Winsor & Newton. These paints offer excellent transparency and mixing capabilities. For autumnal hues, consider warm pigments like Burnt Sienna, Cadmium Yellow, and Quinacridone Red. Experiment with blending these to create realistic pumpkin tones. Avoid fugitive pigments, as they may fade over time. Investing in professional-grade paints will enhance the richness and durability of your artwork, making your watercolor pumpkin truly stand out.
2;3 Brushes for Watercolor Techniques
Selecting the right brushes is crucial for achieving desired watercolor effects. Use round brushes (#6 or #8) for details and blending, while flat brushes (1/2 inch or 1 inch) are ideal for broad strokes and base coats. Natural fibers like sable or synthetic blends are recommended for optimal water absorption. Invest in a variety of sizes to cover both fine details and large areas. Proper brush care, such as rinsing thoroughly and reshaping, ensures longevity. Experiment with different brushstrokes to create texture and depth in your pumpkin painting, enhancing its visual appeal and dimensionality.
2.4 Additional Tools (Pencils, Palette, etc.)
Beyond paints and brushes, essential tools enhance your watercolor pumpkin painting experience. A sharp pencil is ideal for sketching detailed outlines and proportions. A sturdy palette with built-in wells helps organize and mix colors efficiently. Masking fluid protects highlights and fine details from unwanted pigment; A spray bottle maintains optimal paper moisture, while a hairdryer speeds up drying between layers. A ruler or straightedge aids in precise lines for stems or vines. These tools, when used thoughtfully, streamline your process and elevate the quality of your artwork, ensuring crisp, vibrant, and professional results.
Stretching Watercolor Paper
Stretching watercolor paper ensures it remains taut and flat during painting, preventing warping. Soak the paper, then secure it with tape or staples to a board. Allow it to dry completely before painting. This step is crucial for maintaining control and achieving smooth, even washes in your pumpkin artwork.
3.1 Why Stretching Paper is Important
Stretching watercolor paper is essential to prevent warping and buckling during painting. When water is applied, untreated paper can bend or ripple, ruining your artwork. By soaking and securing the paper to a sturdy surface, you ensure it dries flat and remains stable. This step is particularly crucial for large or detailed pieces, as it provides a smooth, even surface for painting. A well-stretched paper also enhances the vibrancy of colors and maintains crisp details, making it a simple yet vital step in achieving professional-looking results for your watercolor pumpkin tutorial.

3.2 Methods for Stretching Watercolor Paper
There are several effective methods to stretch watercolor paper. The most common involves soaking the paper in water, then securing it to a sturdy board or frame with masking tape or clips. Another method uses a spray bottle to dampen the paper evenly before attaching it to a surface. For a more advanced approach, a commercial stretching frame can be used to ensure maximum tautness. Regardless of the method, the goal is to create a smooth, stable surface for painting. These techniques ensure your paper stays flat and resistant to warping during the watercolor pumpkin tutorial process.
3.3 Preventing Warping During Painting
To prevent warping during your watercolor pumpkin painting, ensure the paper is properly stretched and secured. Use high-quality, heavy-weight (140 lb or 300 gsm) watercolor paper, as it resists buckling better than lighter weights. Work in a controlled environment with moderate humidity and avoid over-saturating the paper. Applying gentle, even strokes and allowing layers to dry completely can also help maintain flatness. For added stability, tape the edges of the paper to a sturdy board using masking tape or clips. These practices will ensure your pumpkin painting remains smooth and distortion-free throughout the creative process.
Sketching Your Pumpkin Design
Begin by lightly sketching your pumpkin design on watercolor paper using a graphite pencil. Focus on basic shapes, proportions, and details to create a clear guide for painting. This step ensures accuracy and helps bring your artistic vision to life before adding color.
4.1 Basic Shapes and Proportions
Start your pumpkin design by sketching basic shapes, such as circles or ovals, to establish the pumpkin’s form. Pay attention to proportions to ensure the pumpkin looks balanced and natural. Consider the height and width, making sure they align with your artistic vision. Light, gentle lines will help you refine the shape without committing too early. This foundational step sets the stage for adding details later, allowing your pumpkin to take shape with clarity and precision.
4.2 Detailing the Pumpkin Features
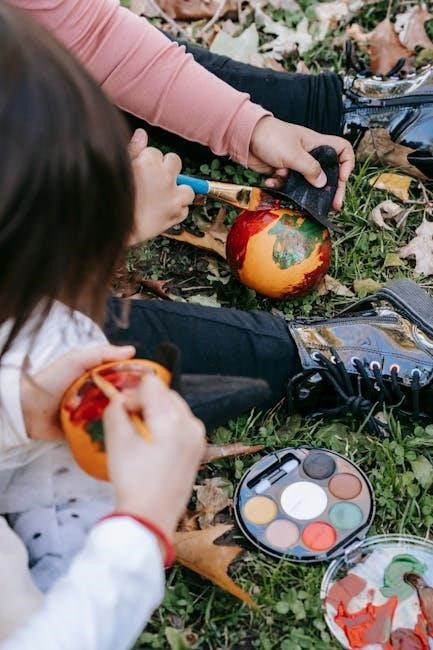
Add character to your pumpkin by sketching its unique features, such as ridges, texture, and stem details. For a more realistic look, define the pumpkin’s segments, ensuring they flow naturally around its form. If painting a decorative pumpkin, consider adding facial expressions or intricate patterns. Use fine brushes to refine these details, ensuring they align with the pumpkin’s proportions. Layering your sketches will help build depth and dimension, making your pumpkin stand out. Pay attention to symmetry and balance to maintain a cohesive design. These details will bring your pumpkin to life, ready for painting.
4.3 Transferring the Sketch to Watercolor Paper
Transfer your pumpkin sketch to watercolor paper using a graphite pencil or a fine-tip pen. Lightly trace the outline and details onto the paper, ensuring accuracy. For intricate designs, use a light box or create a grid system to guide your drawing. Apply gentle pressure to avoid indenting the paper. If needed, layer tracing paper over your sketch and transfer it by rubbing with a pencil or stylus. This step ensures your design is precisely placed and ready for painting. Keep your lines light to maintain flexibility for artistic adjustments during the painting process.
Painting the Pumpkin
Begin by layering light washes to establish the pumpkin’s base tones, gradually building depth with richer colors. Use wet-on-wet techniques for blending and drybrush for texture, creating dimension and detail. Start with soft yellow undertones, then add warm oranges and reds, finishing with dark shadows for contrast. This method ensures a vibrant, lifelike pumpkin that captures the essence of autumn. Follow these steps to bring your watercolor pumpkin to life with stunning results!
5.1 Starting with Light Undertones
Begin your pumpkin painting by applying light washes to establish the base tones. Mix a pale yellow or orange shade with water to create a soft, transparent layer. Gently sweep your brush across the pumpkin’s surface, ensuring even coverage. This initial step sets the foundation for building depth and dimension. Allow the first layer to dry slightly before adding darker hues. Starting light ensures a smooth transition and prevents the colors from becoming too saturated too quickly. This method allows for a natural, gradual build-up of color, essential for achieving a realistic pumpkin texture and appearance. Maintain delicate strokes for a soft, blended look. This process helps in creating a cohesive and balanced artwork. Always remember to let each layer dry before proceeding to the next to avoid muddying the colors. By starting with light undertones, you create a versatile base that can be enhanced with richer pigments later in the process. This approach is ideal for capturing the subtle curves and contours of the pumpkin, making it a key step in your watercolor tutorial journey.
5.2 Building Up Colors Gradually
Once the light undertones are dry, gradually layer darker shades to add depth and dimension to your pumpkin. Mix slightly richer hues by adding more pigment to your watercolor mixture. Use wet-on-wet techniques to blend colors seamlessly, allowing the paint to merge naturally on the paper. Focus on areas where shadows fall, such as the creases and indentations of the pumpkin. Apply the colors in soft, controlled strokes, ensuring each layer is slightly drier than the previous to prevent over-saturation. This gradual build-up enhances the pumpkin’s texture and creates a sense of three-dimensionality. By layering colors carefully, you achieve a vibrant, realistic appearance. This step is crucial for capturing the intricate details and natural curves of the pumpkin, making your artwork more dynamic and engaging. Always allow each layer to dry before adding more pigment to maintain clarity and avoid muddying the colors. This patient approach ensures a stunning, professional finish. Building colors gradually is a foundational skill in watercolor painting, and mastering it will elevate your pumpkin design to the next level. The result is a beautiful, lifelike pumpkin that stands out on your paper, showcasing your artistic skills and attention to detail. This technique is versatile and can be applied to various watercolor projects, making it an essential part of your artistic toolkit. By following these steps, you’ll achieve a balanced and visually appealing piece of art that reflects the beauty of autumn. Always remember, practice makes perfect, so don’t hesitate to experiment and refine your technique. With time and patience, you’ll master the art of building colors gradually, creating stunning watercolor pumpkins every time. This process is not only rewarding but also helps you develop a deeper understanding of color theory and its application in watercolor painting. Keep practicing, and you’ll see consistent improvement in your work. Building up colors gradually is a key step in creating a realistic and eye-catching pumpkin, so take your time and enjoy the creative journey.
5.3 Adding Shadows and Depth
Mixing Colors for Realistic Pumpkin Hues
Mastering color mixing is essential for achieving realistic pumpkin hues; Combine warm yellows, oranges, and reds, adjusting tones to capture the natural variations in pumpkin skin. Experiment with subtle shifts by adding touches of green or brown for depth and dimension, ensuring your pumpkin looks authentic and vibrant. This section will guide you through expert techniques to blend and layer colors effectively, bringing your watercolor pumpkin to life with rich, dynamic hues that reflect the beauty of autumn. Proper color mixing enhances the overall appeal of your artwork, making it stand out with lifelike detail and texture. By understanding how to mix and apply these colors, you can create a stunning, realistic pumpkin that showcases your artistic skill and attention to detail. The key is to balance warm and cool tones, creating a harmonious palette that captures the essence of fall. With practice, you’ll achieve the perfect blend of colors for your watercolor pumpkin, making it a true masterpiece. Your artwork will radiate the warmth and vitality of the season, inviting viewers to appreciate the intricate beauty of your creation. This step is crucial for transforming your sketch into a vibrant, lifelike pumpkin that tells a story of its own. By following these color mixing tips, you’ll unlock the full potential of your watercolor paints and bring your pumpkin to life with stunning realism. The process is both challenging and rewarding, allowing you to grow as an artist while enjoying the therapeutic benefits of painting. Embrace the creativity and watch your pumpkin flourish on paper, a testament to your dedication and passion for watercolor art.
6.1 Understanding Color Theory Basics
Understanding color theory is fundamental for mixing realistic pumpkin hues. It begins with the color wheel, which shows how colors relate and blend. Primary colors—red, yellow, and blue—are the foundation, while secondary colors like orange are created by mixing two primaries. Warm colors, such as oranges and yellows, evoke warmth and energy, perfect for capturing the vibrant tones of pumpkins. Cool colors, like greens and blues, can add depth and contrast. Value refers to the lightness or darkness of a color, essential for creating dimension. By grasping these principles, you can mix harmonious, lifelike hues for your pumpkin, ensuring a visually appealing result. Proper color theory application enhances the realism and appeal of your artwork, allowing you to achieve the desired aesthetic effortlessly. This knowledge is key to unlocking your full creative potential in watercolor painting, making every brushstroke intentional and impactful. The basics of color theory provide a solid foundation for any artistic project, enabling you to experiment confidently and achieve stunning outcomes. Whether you’re a novice or an experienced artist, understanding color theory will elevate your skills and bring your watercolor pumpkins to life with vibrant, realistic colors. The principles of color theory are timeless and universal, offering a reliable guide as you explore the world of watercolor painting. By mastering these basics, you’ll be well-equipped to tackle any artistic challenge, creating beautiful and captivating works of art. The interplay of colors on your palette is a powerful tool, and understanding how to harness it will make your pumpkin painting a true masterpiece. Color theory is not just a set of rules—it’s a creative language that helps you express your vision with precision and flair. Embrace it, and watch your art flourish with each new project. The world of color is at your fingertips, waiting to be explored and celebrated in every stroke of your brush. With this foundation, you’ll be able to mix and match colors with confidence, knowing exactly how each shade will interact and enhance your pumpkin’s appearance. The journey of learning color theory is as rewarding as the art itself, offering endless opportunities for growth and artistic expression. So, dive in, experiment, and let the colors guide you to creating something truly special. Your watercolor pumpkin will be a testament to your understanding and skillful application of these timeless principles. The more you practice, the more intuitive color mixing will become, allowing you to focus on the creative process and enjoy the therapeutic aspects of painting. Remember, color theory is your tool, and with it, the possibilities are endless. Let your brush dance with color, and bring your pumpkin to life in a celebration of light, shadow, and vibrant hues. The beauty of watercolor lies in its unpredictability, but with a solid grasp of color theory, you can navigate its flow with confidence, achieving results that inspire and delight. So, embrace the basics, explore the possibilities, and let your creativity shine through every color choice you make. The world of watercolor is yours to discover, one brushstroke at a time.
6.2 Mixing Warm and Cool Tones
Mixing warm and cool tones is essential for creating realistic pumpkin hues. Start with warm tones like orange and yellow to capture the pumpkin’s vibrant base color. Gradually incorporate cool tones, such as green or blue, to add depth and dimension, especially in shadows. Use water to blend these tones softly, ensuring a natural transition. Balancing warm and cool tones creates a lifelike appearance, enhancing the pumpkin’s texture and form. Experiment with layering to achieve rich, dynamic colors that bring your pumpkin to life. This technique allows for subtle shifts in tone, adding complexity and visual interest to your artwork. By mastering this blend, you’ll create a captivating, three-dimensional effect. The interplay of warm and cool tones will make your pumpkin stand out, giving it a realistic and inviting look. This step is crucial for adding depth and realism, ensuring your pumpkin painting is both vibrant and believable. With practice, mixing warm and cool tones will become second nature, allowing you to achieve stunning results in your watercolor projects. The combination of these tones will elevate your pumpkin’s appearance, making it the focal point of your artwork. Embrace this technique to unlock the full potential of your watercolor palette and create a masterpiece that draws the eye and sparks admiration. The balance of warm and cool tones is key to creating a visually striking pumpkin, full of character and dimension. This approach ensures your painting is both expressive and authentic, capturing the essence of autumn in every brushstroke. By blending these tones effectively, you’ll add layers of interest and depth, transforming your pumpkin into a vibrant, lifelike subject. The harmony of warm and cool tones will make your artwork stand out, showcasing your skill and creativity. This technique is a cornerstone of watercolor painting, enabling you to achieve the desired aesthetic with precision and flair. With each careful mix, you’ll bring your pumpkin closer to life, creating a piece that resonates with beauty and artistry. The interplay of warm and cool tones is a powerful tool in your artistic arsenal, offering endless possibilities for expression and growth. Use it wisely, and watch your pumpkin painting flourish with each new layer of color. The result will be a stunning blend of warmth and coolness, capturing the essence of autumn in a single, breathtaking piece. The beauty of watercolor lies in its ability to convey emotion through color, and this technique allows you to do just that. So, embrace the process, experiment with tone, and let your creativity shine through every mix. Your pumpkin will thank you, and so will your audience. The world of color is at your fingertips—mix, blend, and create with confidence. The perfect balance of warm and cool tones will make your pumpkin painting a true masterpiece, a testament to your skill and artistic vision. With each stroke, you’ll bring your pumpkin to life, capturing the magic of the season in vivid, dynamic hues. The journey of mixing warm and cool tones is as rewarding as the final result, offering you a chance to grow and express yourself through art. So, dive in, explore the possibilities, and let your colors tell a story. The pumpkin will be more than just a subject—it will be a celebration of light, shadow, and the beauty of nature. Your brush is the key, and the world of color is your canvas. Paint with passion, and let your pumpkin shine! The art of mixing warm and cool tones is a timeless technique, offering you a pathway to creating something truly special. With each careful blend, you’ll unlock new dimensions in your artwork, bringing your pumpkin to life in a way that captivates and inspires. The process is as enjoyable as the result, allowing you to connect with your creativity and express your unique vision. So, embrace the challenge, experiment with tone, and let your pumpkin painting be a reflection of your artistic soul. The possibilities are endless, and the journey is as rewarding as the destination. Mix, blend, and create with confidence, knowing that each stroke brings you closer to a masterpiece. The world of watercolor is yours to explore, and the pumpkin is your perfect subject. Let the colors guide you, and let your passion shine through every brushstroke. The beauty of autumn is at your fingertips—capture it with warmth, depth, and a mastery of tone. Your pumpkin painting will be a testament to your skill and creativity, a celebration of color and light. So, keep painting, keep experimenting, and let your art be a reflection of your love for the craft. The perfect blend of warm and cool tones will make your pumpkin stand out, capturing the essence of the season in a way that resonates with all who see it. The journey of creation is as fulfilling as the final piece, offering you a chance to grow and express yourself through the timeless medium of watercolor. Embrace the process, enjoy the ride, and let your pumpkin painting be a masterpiece of color and light. The world of art is waiting for you—take your place with confidence and creativity. The pumpkin is just the beginning; the possibilities are endless. Mix, blend, and create, knowing that each stroke is a step toward something extraordinary. The art of watercolor is a journey of discovery, and your pumpkin is the perfect companion. Let the colors guide you, and let your passion shine through every brushstroke. The beauty of autumn is at your fingertips—capture it with warmth, depth, and a mastery of tone. Your pumpkin painting will be a testament to your skill and creativity, a celebration of color and light. So, keep painting, keep experimenting, and let your art be a reflection of your love for the craft. The perfect blend of warm and cool tones will make your pumpkin stand out, capturing the essence of the season in a way that resonates with all who see it. The journey of creation is as fulfilling as the final piece, offering you a chance to grow and express yourself through the timeless medium of watercolor. Embrace the process, enjoy the ride, and let your pumpkin painting be a masterpiece of color and light. The world of art is waiting for you—take your place with confidence and creativity. The pumpkin is just the beginning; the possibilities are endless. Mix, blend, and create, knowing that each stroke is a step toward something extraordinary. The art of watercolor is a journey of discovery, and your pumpkin is the perfect companion. Let the colors guide you, and let your passion shine through every brushstroke. The beauty of autumn is at your fingertips—capture it with warmth, depth, and a mastery of tone. Your pumpkin painting will be a testament to your skill and creativity, a celebration of color and light; So, keep painting, keep experimenting, and let your art be a reflection of your love for the craft. The perfect blend of warm and cool tones will make your pumpkin stand out, capturing the essence of the season in a way that resonates with all who see it. The journey of creation is as fulfilling as the final piece, offering you a chance to grow and express yourself through the timeless medium of watercolor. Embrace the process, enjoy the ride, and let your pumpkin painting be a masterpiece of color and light. The world of art is waiting for you—take your place with confidence and creativity. The pumpkin is just the beginning; the possibilities are endless. Mix, blend, and create, knowing that each stroke is a step toward something extraordinary. The art of watercolor is a journey of discovery, and your pumpkin is the perfect companion. Let the colors guide you, and let your passion shine through every brushstroke. The beauty of autumn is at your fingertips—capture it with warmth, depth, and a mastery of tone. Your pumpkin painting will be a testament to your skill and creativity, a celebration of color and light. So, keep painting, keep experimenting, and let your art be a reflection of your love for the craft. The perfect blend of warm and cool tones will make your pumpkin stand out, capturing the essence of the season in a way that resonates with all who see it. The journey of creation is as fulfilling as the final piece, offering you a chance to grow and express yourself through the timeless medium of watercolor. Embrace the process, enjoy the ride, and let your pumpkin painting be a masterpiece of color and light. The world of art is waiting for you—take your place with confidence and creativity. The pumpkin is just the beginning; the possibilities are endless. Mix, blend, and create, knowing that each stroke is a step toward something extraordinary. The art of watercolor is a journey of discovery, and your pumpkin is the perfect companion. Let the colors guide you, and let your passion shine through every brushstroke. The beauty of autumn is at your fingertips—capture it with warmth, depth, and a mastery of tone. Your pumpkin painting will be a testament to your
Displaying Your Finished Artwork
6.3 Achieving Gradient Effects
Achieving gradient effects in your watercolor pumpkin adds depth and dimension. Start by wetting the area with clean water, then apply lighter colors at the base. Gradually introduce darker shades toward the top, allowing the colors to blend naturally. Use the wet-on-wet technique to create smooth transitions. For softer gradients, dampen your brush and gently merge the edges. Layering thin washes and allowing each layer to dry prevents muddying the colors. This method enhances the pumpkin’s rounded form, giving it a realistic, three-dimensional appearance. Practice blending to master the subtle shifts in tone that bring your pumpkin to life.